Captions and Subtitles in GoToMeeting or GoToWebinar Recordings
Step 1 – Select Your Videos in GoToMeeting Recording Manager
Depending on how your GoToMeetings settings are configured, the Recording Manager will launch either immediately upon completion of the recording process or it will need to be manually launched.
- If the Recording Manager is set to Convert immediately then as soon as a session ends the Recording Manager will automatically launch and prompt you to convert your recordings.
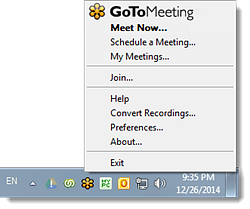
- If the Recording Manager is set to Convert later Windows users will need to right-click the daisy icon in your system tray and selecting Convert Recordings.
Mac users will need to click Preferences > Recordings > Convert Recordings Now.
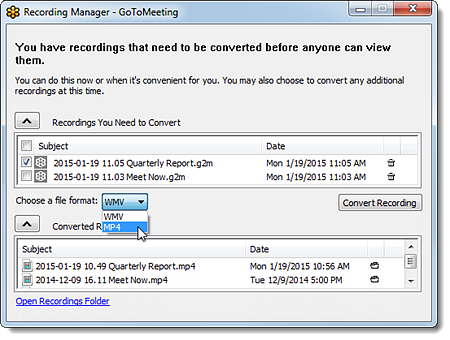
Check the box beside the recordings you want to download.
Step 2 – Download Recordings in MP4 Format
GoToMeeting and GoToWebinar recordings are saved in .GTM format by default. You’ll need to convert the recording to a format that our video transcription software can process.
Click Choose a file format and from the drop-down menu that appears select the desired format: .wmv or .mp4 for Windows, .mp4 and .mov for Macs. For this example, let’s use MP4.
Click Convert Recording. The file conversion and download process will begin, and it may take a few minutes to complete.
Step 3 – Submit Your GoToMeeting or GoToWebinar Recording for Captioning
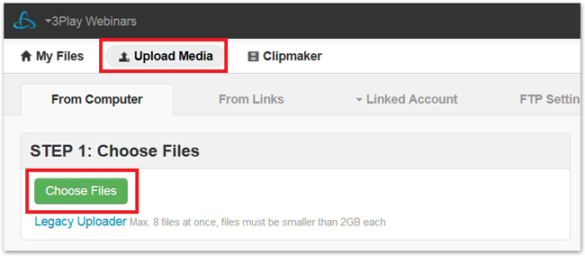
Log into your 3Play Media account. From the Upload tab at the top of the screen, select From Computer, choose your video, and follow the onscreen prompts to specify turnaround. You’ll receive an email when your captions are ready.
For additional details, read the support article on uploading videos for captioning.
Step 4 – Download Your Captioned M4V File
This step will produce a self-contained M4V file with embedded closed captions that can be turned on or off by the end user. There is also an option to produce an M4V file with open captions that are burned into the video and can’t be turned off.
From your 3Play Media account, select My Files from the top of the page.
Select your GoToMeeting or GoToWebinar recording, and from the Options menu select Order Caption Encoding.
The caption encoding process may take up to 4 hours. Upon completion, you will receive an email notification with a link to download the video.

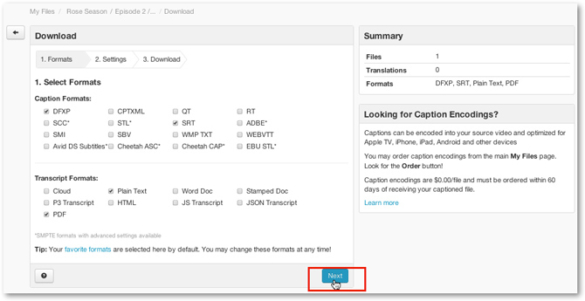
How to Download a Transcript of your GoToMeeting Recording
To download a transcript of your GoToMeeting session, navigate to your recording file from My Files on your 3Play account. Check the box next to your file and hit Download.
In this dialogue box, select the file format(s) you want for your transcript file. A plain text file, PDF, or MS Word Doc should be sufficient for most transcript needs. Hit Next and follow the prompts to complete your download.