Captions and Subtitles with Apple Compressor
![]()
Apple Compressor 4 is a cheap, simple, fast solution for encoding and exporting video projects. Compressor 4 has advanced encoding options that allow you to add closed captions to your videos when encoding QuickTime or MPEG files.
This blog will show you step by step how to add SCC closed captions to your Apple Compressor projects.
Step 1: Submit Your Video File for Captioning
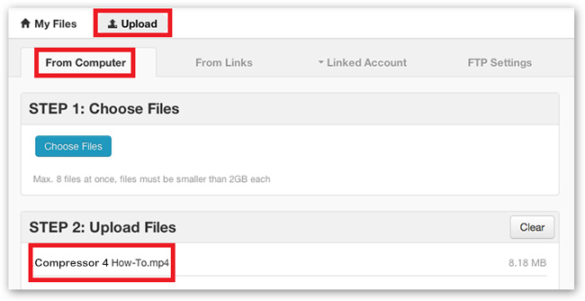
To add captions in Compressor, you will first need a high-quality source file of your video. Log in to your 3Play Media account. From the Upload menu, select From Computer, choose your source video file, and follow the onscreen prompts to specify turnaround. You’ll receive an email when your captions are ready.
For additional details, read the support article on uploading videos for captioning.
Step 2: Download Your Captions in SCC Format
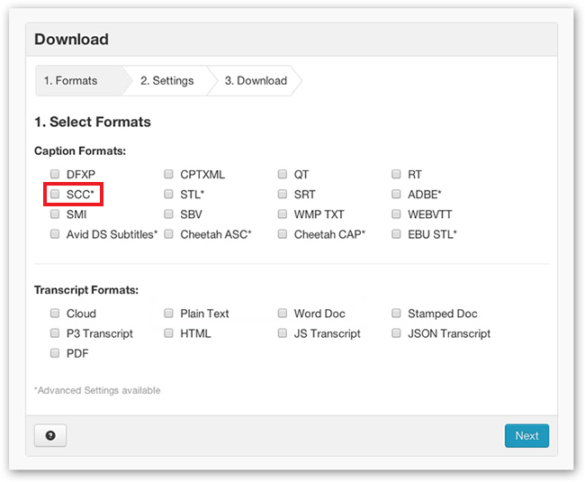
Go to the My Files page in your 3Play Media account and select your recording. Click Download and select the SCC transcript format. Save the .scc file to your computer.
Step 3: Create a New Batch in Apple Compressor
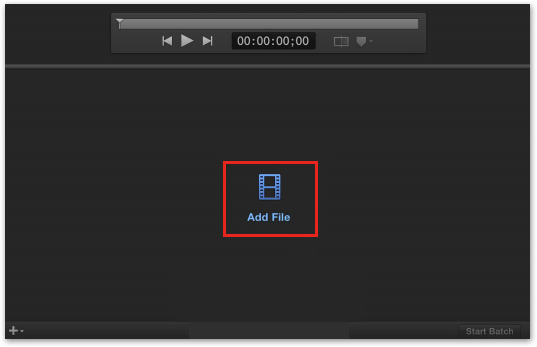
Open Compressor and select Add File. Select your source video file to start a new project (note that in Compressor, the individual file is the “job” and the project is referred to as a “batch”).
Step 4: Select Settings, Destination, and Output Location for Your Batch
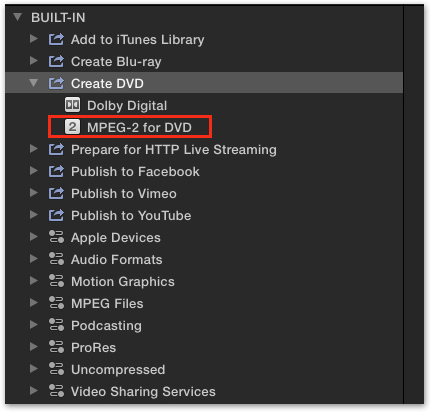
From the Settings pane, select a built-in destination for your file (such as Create DVD or Publish to YouTube) or create a custom destination. This will apply settings to your file. Note that you can only add captions to QuickTime files and MPEG-2 files.
Next, choose the Location tab next to settings to save the transcoded media file from the pop-up menu (such as your desktop, your Movies folder, or the source folder). Click OK.
Step 5: Add Captions to Your Compressor Batch
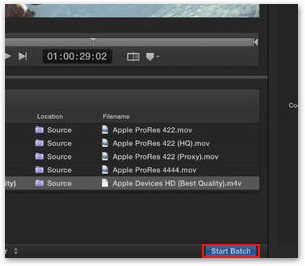
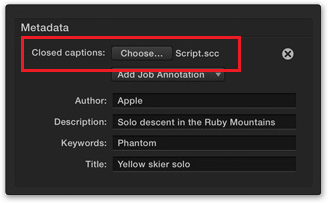
In the batch area, select the source file that you submitted for captioning (click on the source filename). Open the Inspector pane. In the Metadata area, click the Choose button next to “Closed captions” and select your SCC captions file. Click Open.
Note: Compressor can only add SCC closed caption files to QuickTime files and to MPEG-2 files. Captions will work with both MPEG-2 elementary stream files and MPEG-2 program and transport stream files. Keep in mind that the timecode of the closed caption file must directly match the timecode of the source media file.
Step 6: Output Your Video File with Captions
In the project pane, click Start Batch in the lower-right corner of the batch area to begin transcoding. Open your completed file and view it with captions!