Captions and Subtitles with Adobe Presenter
 Adobe Presenter is a lecture capture software that allows you to create HD video lectures by simultaneously capturing your screen content as well as your webcam video.
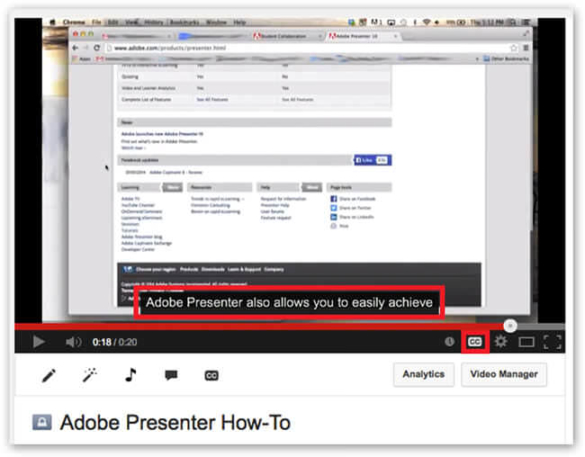
Adobe Presenter also allows you to achieve Section 508 compliance by providing tools that meet accessibility requirements for government and educational organizations. Section 508 of the Rehabilitation Act requires most educational and informational technology to provide text alternatives to multimedia content; Adobe Presenter provides the ability to add closed captions to your presentations.
Here's how to create and add 99%+ accurate closed captions for your Adobe Presenter projects.
Adobe Presenter is a lecture capture software that allows you to create HD video lectures by simultaneously capturing your screen content as well as your webcam video.
Adobe Presenter also allows you to achieve Section 508 compliance by providing tools that meet accessibility requirements for government and educational organizations. Section 508 of the Rehabilitation Act requires most educational and informational technology to provide text alternatives to multimedia content; Adobe Presenter provides the ability to add closed captions to your presentations.
Here's how to create and add 99%+ accurate closed captions for your Adobe Presenter projects.
Step 1: Record Your Project in Adobe Presenter
Open Adobe Presenter and create a new project.
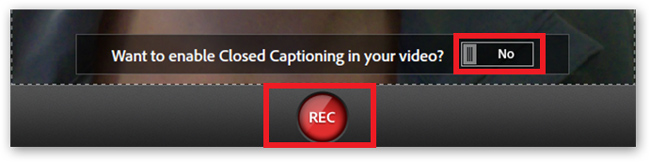
The player should read, “Want to enable Closed Captioning in your video?” Set the slide bar to No (to avoid getting captions via automatic speech recognition, you will add in captions later).
Press the REC button to begin your recording.
When your recording is complete, use the editor to select presentation options for your project. If you want to trim or cut parts of your project, make sure you do that before moving on to the next step!
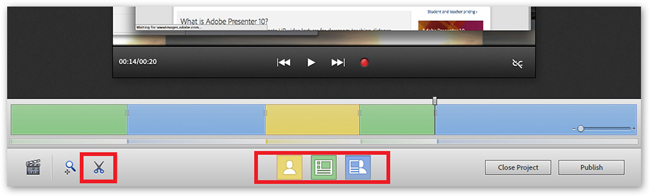
When you are happy with your presentation, click Publish and select Publish to Computer. When the files are finished processing, they will be saved to your computer. Your presentation should be saved as an MP4 file.
Step 2: Submit Your Presentation for Transcription
Log into your 3Play Media account.
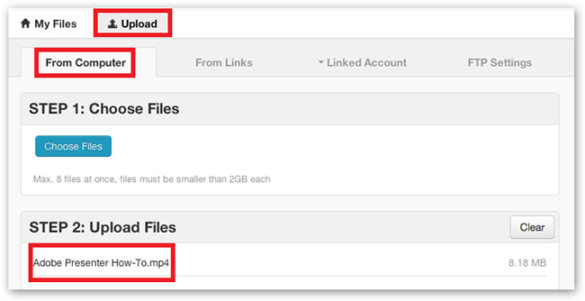
Click Upload and select the From Computer tab. Select your MP4 file from step 1 and follow the prompts to select turnaround. You will receive an email when your transcription is complete.
Note: If you already have a transcript, you do not need to complete step 2 or step 3.
Step 3: Download Your Transcript as Plain Text or as a Word Doc
Go to the My Files page in your 3Play Media account and select your recording.
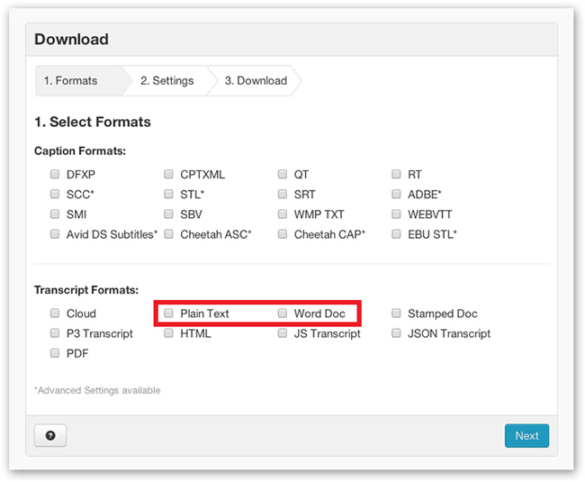
Click Download and select the Plain Text or Word Doc transcript format. Save the .txt or .doc file to your computer.
Step 4: Use Your Transcript to Generate Accurate Closed Captions in Adobe Presenter
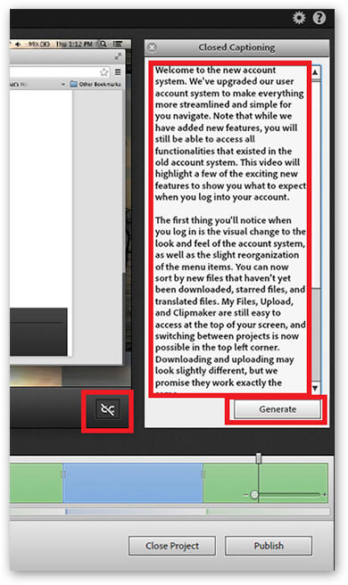
Open your project in Adobe Presenter. You’ll see a CC icon with a slash through it. Click on this icon to open the Closed Captioning window.
Copy and paste the transcript that you downloaded in step 3 into this window and click Generate to create your closed captions.
Step 5: Select Closed Captioning Settings
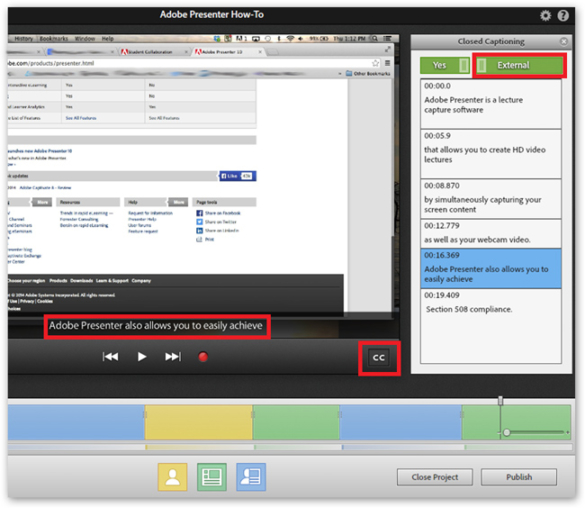
Click the CC icon to view your closed caption slides.
If you want to embed the captions in the video, make sure the slider is turned to Embed.
However, if you want users to be able to turn captions on and off, you want to set the slider to External. This will export your captions as an SRT file with your presentation.
Note: Unfortunately, Adobe Presenter does not allow you to upload your own SRT caption file.
Step 6: Publish Your Adobe Presenter Project with Closed Captions
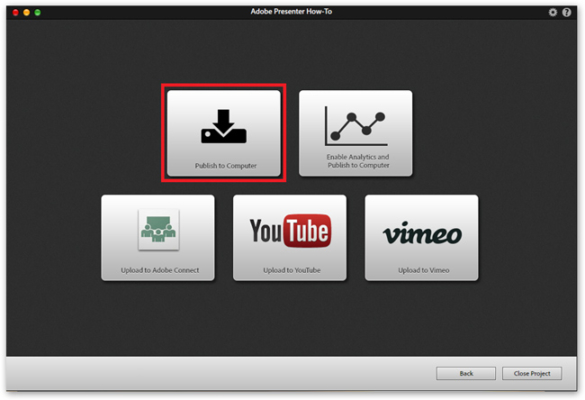
When you have previewed your presentation with closed captions and are satisfied with your project, select Publish.
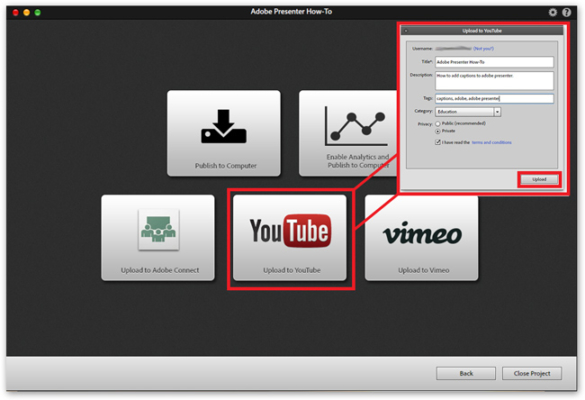
You can choose to publish your project to your computer, to Adobe Connect, to YouTube, or to Vimeo. Your SRT caption file will be published with your project.
For example, you can publish your project to YouTube by selecting Upload to YouTube. When prompted, enter your YouTube login credentials, fill out the details of your video, and click Upload.
Step 7: View Your Presentation with Closed Captions
Once your video has been published, go to your channel and view your project with closed captions!