How to Set Up Live Auto Captions for Zoom Meetings 🗓️
Follow this guide to schedule live auto captions for a Zoom meeting once Zoom has been linked to your 3Play Media project.

In order to be able to schedule and set up 3Play Media’s Live Auto Captions within a Zoom Meeting you must be the Host of the Zoom Meeting!
➡️ Step 1: Navigate to Zoom Scheduler
![]()
Launch the Zoom application.
![]()
Navigate to Home and click Schedule.
➡️ Step 2: Schedule Zoom Meeting
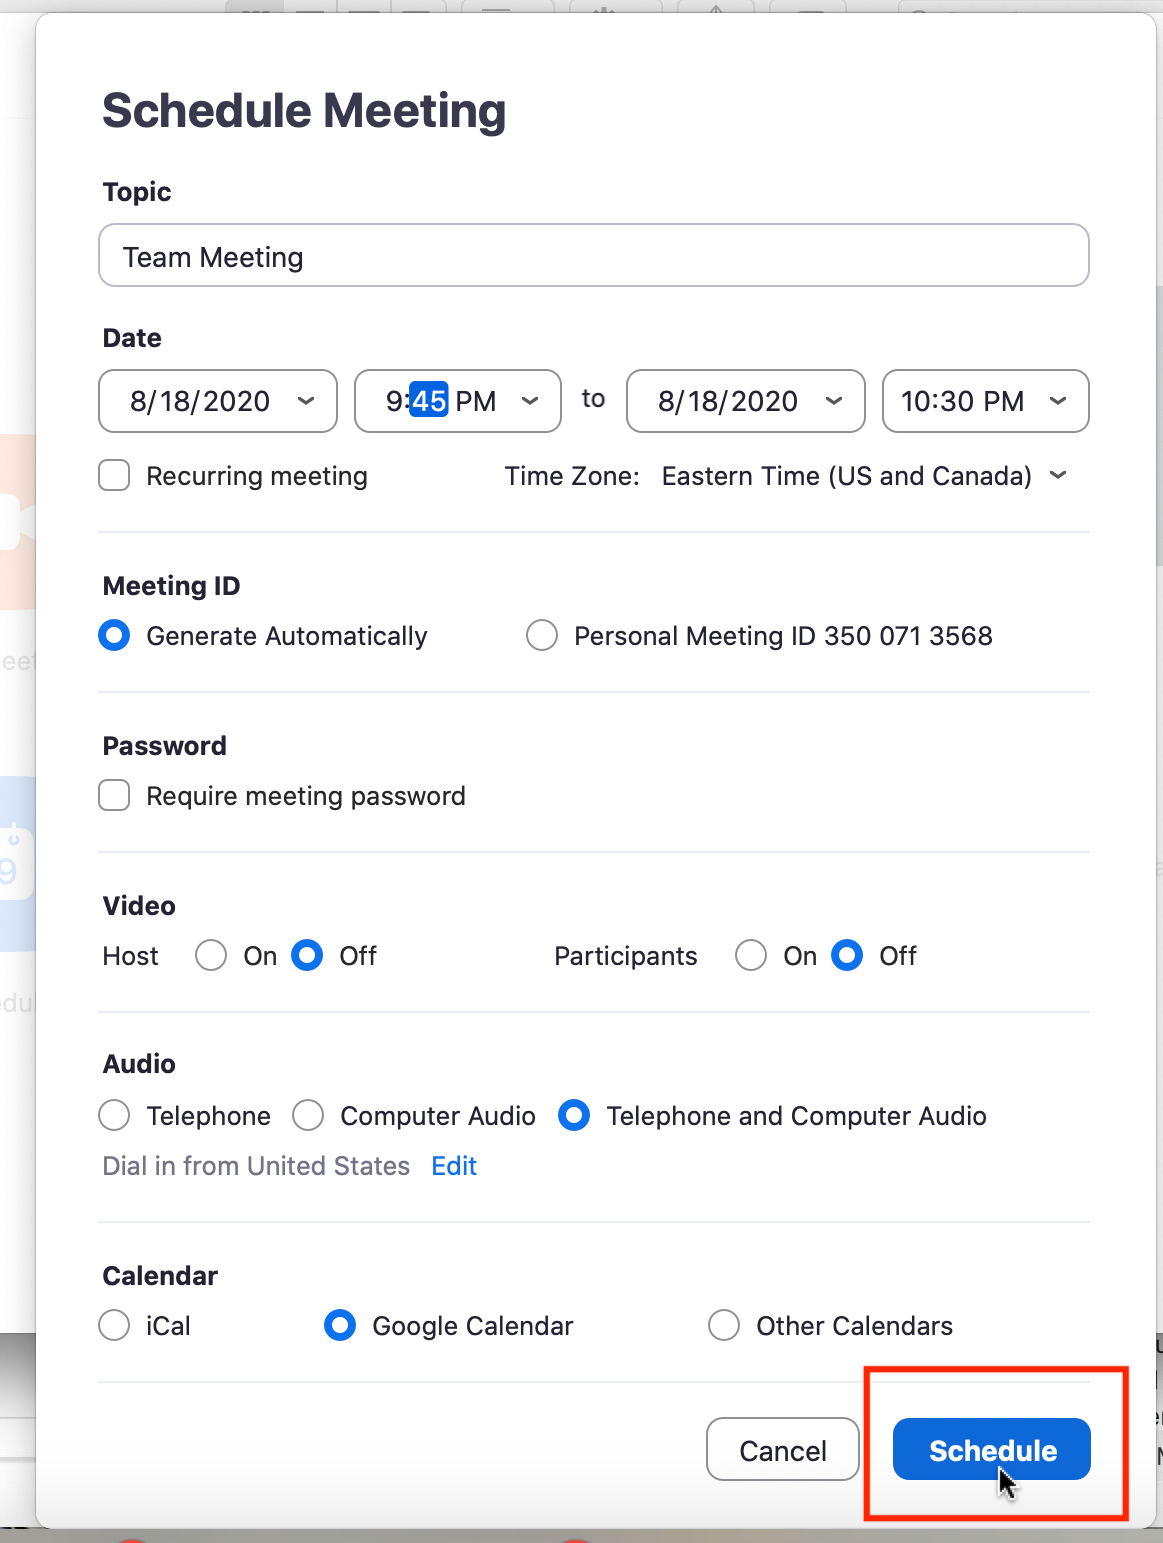
Set the meeting’s Date and Time within Zoom, adding any other information and settings necessary.
Note that 3Play Media’s Live Auto Captioning will work with a password-protected meeting.
Click Schedule.
➡️ Step 3: Navigate to 3Play Media’s Live Auto Captioning Module

Sign in to 3Play Media and click Live Auto Captioning in the top navigation bar.
➡️ Step 4: Within 3Play Media, Click Schedule Live Captions

➡️ Step 5: Select Zoom
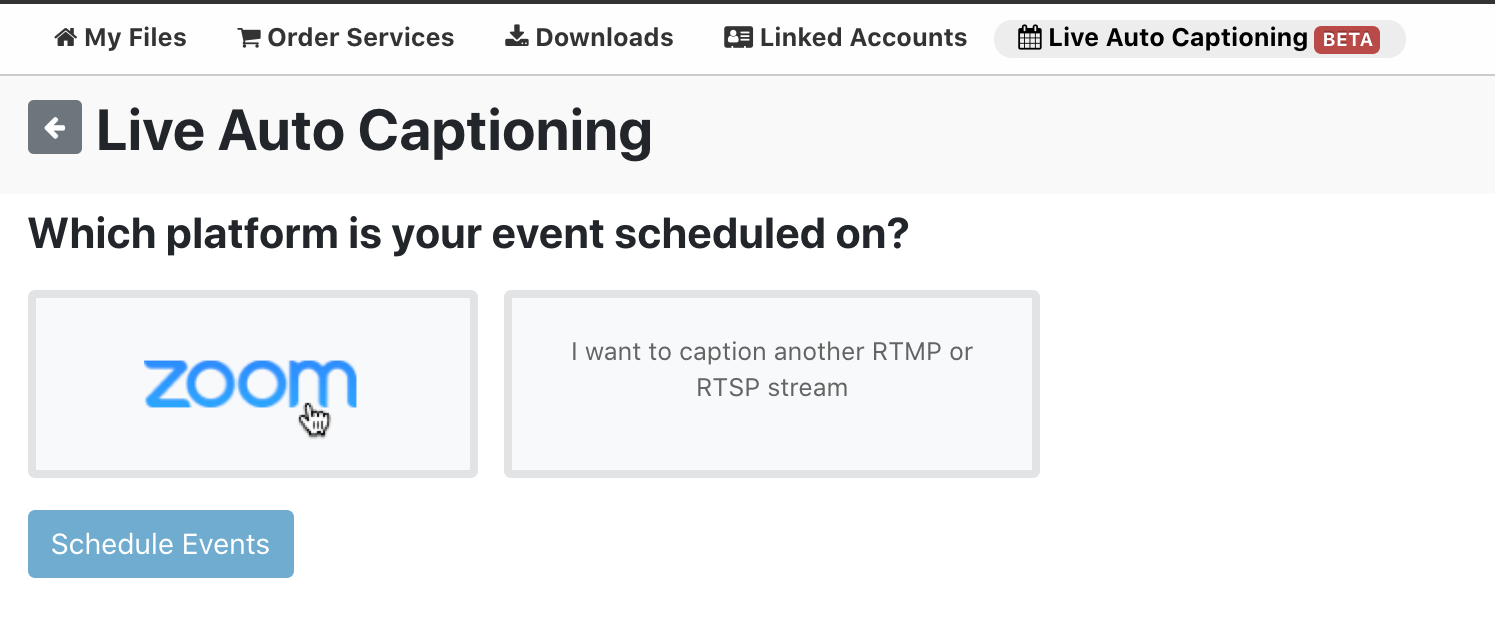
Click the Zoom icon.
➡️ Step 6: Input Scheduler’s Email Address
Under Show Zoom events scheduled by: enter the email address that was used when scheduling the Meeting within Zoom.
➡️ Step 7: Select Meeting

Select Meeting and any upcoming meetings that were scheduled using the email address provided in step 6 will then display.
Check the box next to the Meeting requiring Live Auto Captions.
➡️ Step 8: Configure Live Auto Captions
Start Captions: Once the Meeting is selected note that Start Captions defaults to 15 Minutes Before. This is 3Play Media’s suggested setting as it should allow enough time to ensure the captions will display during the YouTube Live event however it can be adjusted to At Event Start Time, 5 Minutes Before, 10 Minutes Before, 20 Minutes Before, or 30 Minutes Before.
Wordlists (Optional): Click + Add Wordlist to provide any words the inform the automatic speech recognition process. Once words have been added, click Add Wordlist.
Advanced Settings
Maximum Captioning Delay: This will set a delay between the stream we receive and the captions we output. Longer latency will result in a more accurate output. Defaults to 5000ms (5 second delay) however this can be toggled between a 2-15 second delay.
Stream Wait Time: Set an amount of time for our system to wait for the event to begin. Once the determined wait time is reached for the scheduled event and the event has not started, the scheduled captions will no longer be available. Defaults to 30 minutes
Max Stream Time: Set a maximum time for your live captioning event. This feature can be used as a safety net should a live event not be manually stopped. The Max Stream Timewill determine a hard stop for the event as well. If it is anticipated that a live event may run longer than scheduled, factor this when determining the Max Stream Time. Events in your project can be no longer than the Event Max Time setting. Defaults to 240 minutes
Note that when a live event stream is manually stopped this will also override the set Max Stream Time and conclude the live auto captions for the event as well.
Save Event Stream: If enabled, the live stream will be saved as the source for the file after the event. This is useful if service upgrades are anticipated. Leave this off otherwise as it incurs extra processing both during and after the event and costs an additional $0.10/min.
Profanity Filter: Set a sensitivity level for filtering out offensive words. Defaults to Normal however it can be changed to None or Strict.
IMPORTANT: Advanced Settings can be edited up to 5 minutes prior to scheduled start of the Live Auto Captions!
➡️ Step 9: Start Zoom Meeting
Go to the scheduled Meeting within Zoom and Start the event.
➡️ Step 10: Copy Zoom API Token and Paste within 3Play Media
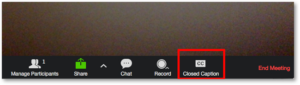
Within Zoom, click Closed Caption.
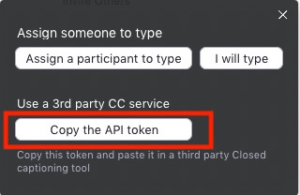
From the menu that appears, click Copy the API token located under Use a 3rd party CC service.
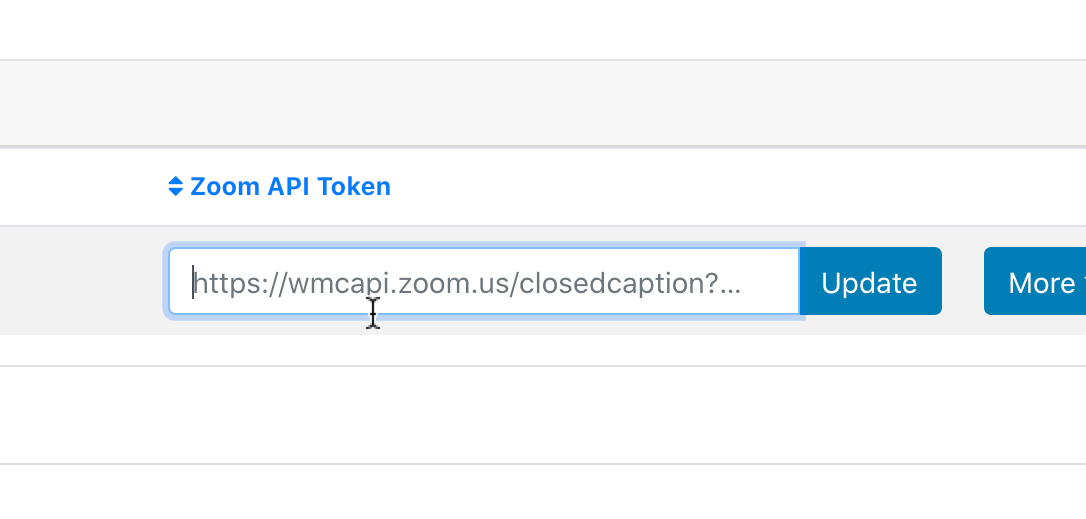
Within 3Play Media paste the API token in the Zoom API token field associated with the event scheduled in step 8.
Next click Update.
➡️ Step 11: Click Live on Custom Live Streaming Service
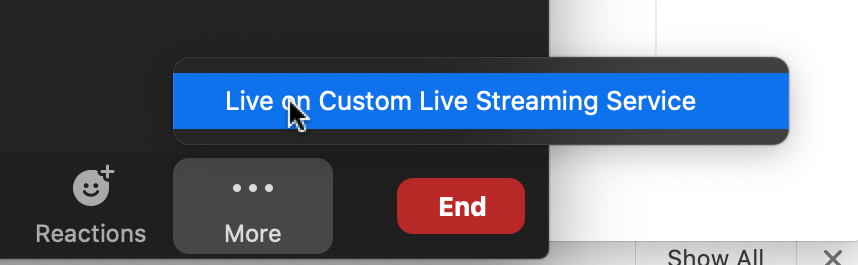
Within Zoom click More followed by Live on Custom Live Streaming Service.
The closed captions will be available as an option for all meeting members shortly after this button is clicked.
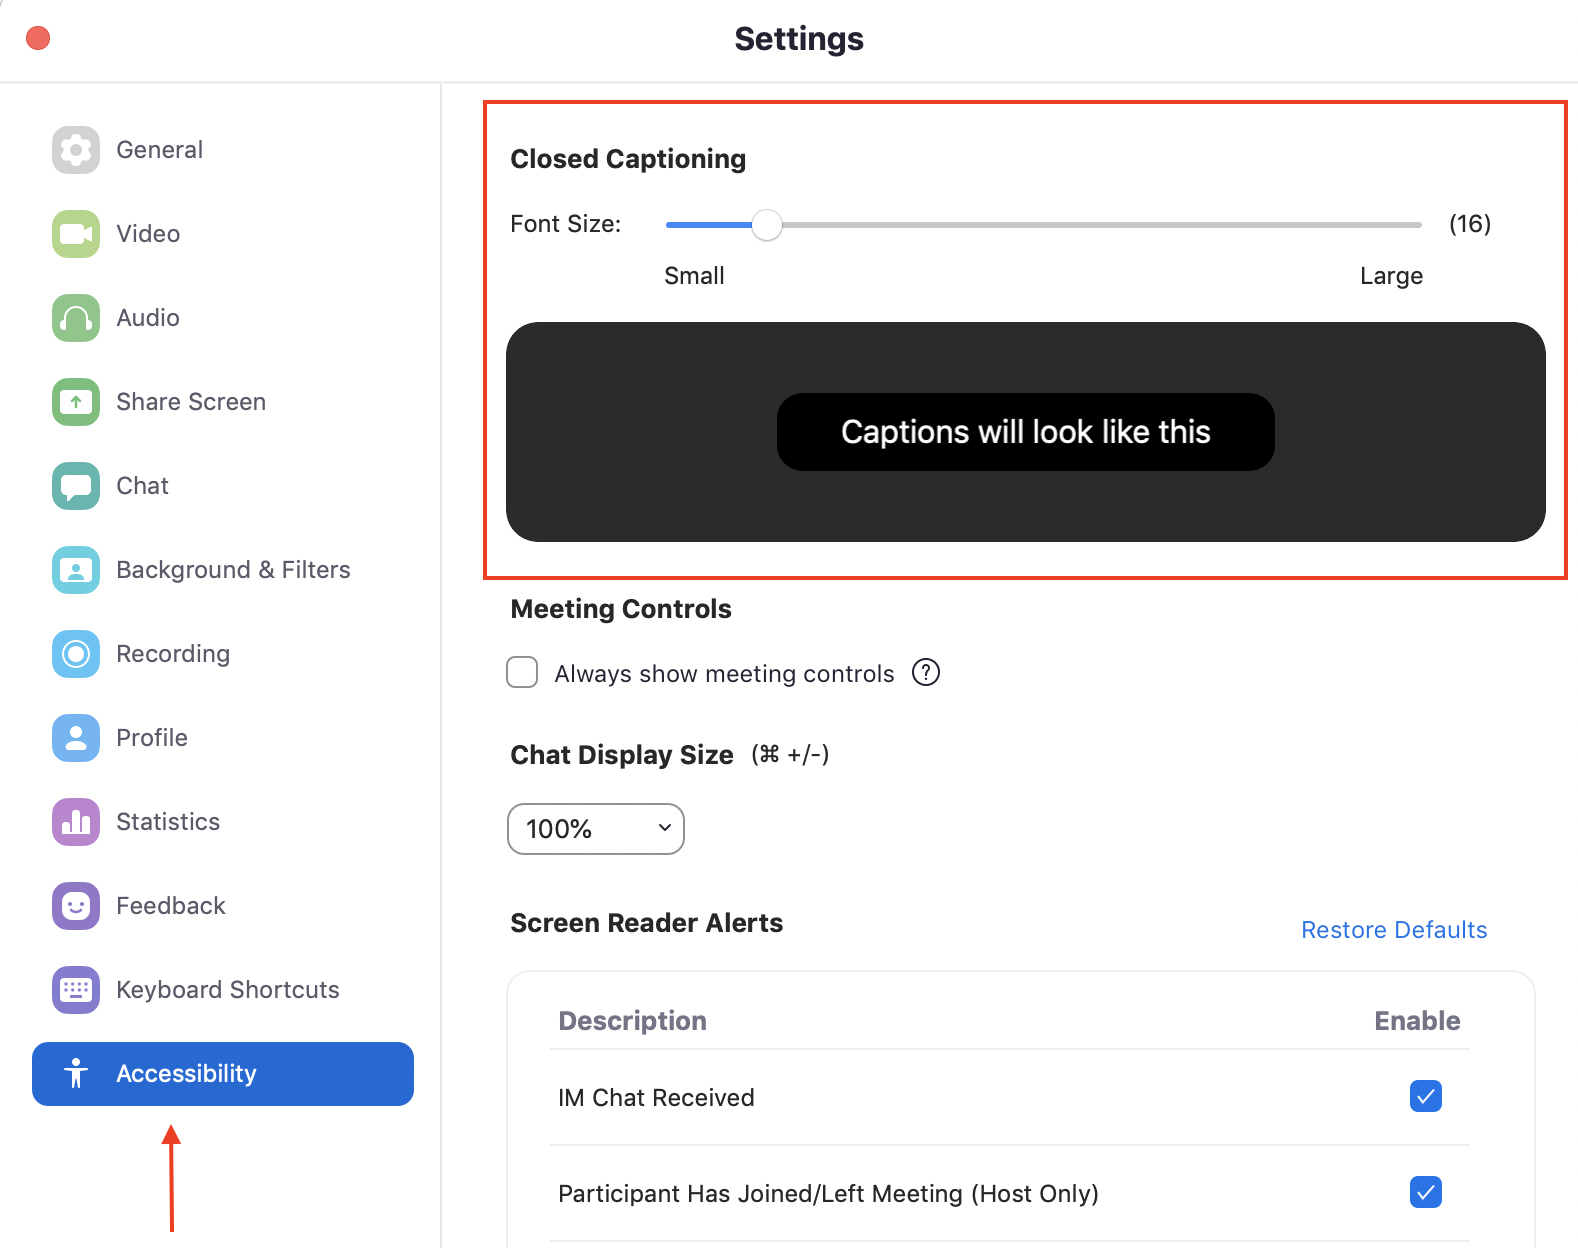
Caption size can be controlled in Zoom’s settings in the desktop client, under the “Accessibility” section. Click and drag the slider to make closed captions smaller or larger. Sizes range from 14-32 depending on your preference.
How-To Guide: Learn how to add captions and transcripts to Zoom Video Conference Recodings.