


- Captioning
Avid Media Composer Captions and Subtitles
Adding Closed Captions and Subtitles in Avid Media Composer
Avid Media Composer is a video production software. Avid Media Composer versions 3.0 and above offer a plugin called AVX SubCap Effect. This tool is used to upload and format caption or subtitle tracks to your video.
This step-by-step guide will show you the best way to add captions to your video in Avid Media Composer with 3Play Media. For more information about working with Avid, visit their official knowledgebase article on captioning.
resource
How to Add Closed Captions to Videos in Avid Media
This how-to guide will show you how to add captions and subtitle tracks to your videos in Avid Media Composer.
Step 1: Submit Your Video File for Transcription & Captioning
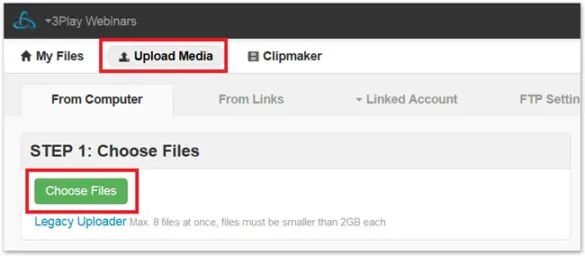
Log into your 3Play Media account.
From the Upload tab at the top of the screen, select From Computer, choose your video file, and follow the onscreen prompts to specify turnaround. You’ll receive an email when your captions are ready.
For additional details, read the support article on uploading videos for captioning.
Step 2: Download Your Caption File
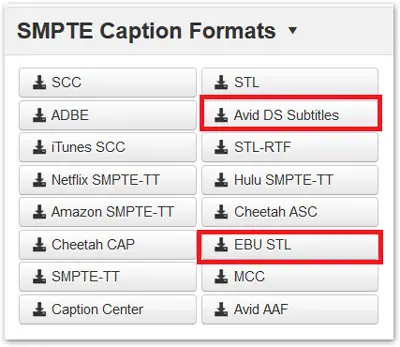
Go to the My Files page in your 3Play Media account and select your recording. Click Download. Under the SMPTE caption formats section, check the Frame Rate Settings to ensure your caption file will have the same frame rate as your video.
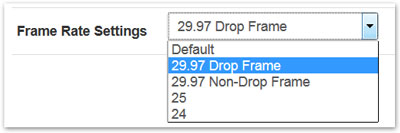
Then select either Avid DS (.txt) or EBU STL (.stl) format. A dialogue box will pop up prompting you to download the file to your computer.
Step 3: Add Captions to Your Avid Media Composer Project
Open your video file in Avid Media Composer.
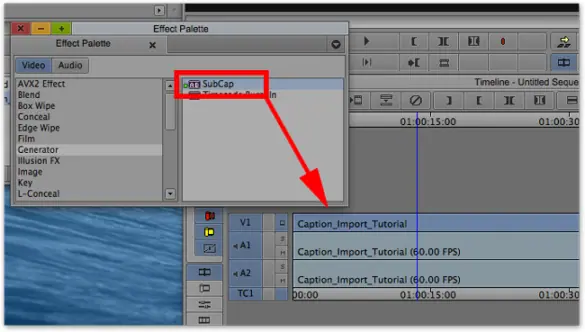
Go to Tools > Effect Palette > Generator > SubCap.
Drag SubCap onto the video track in your timeline.
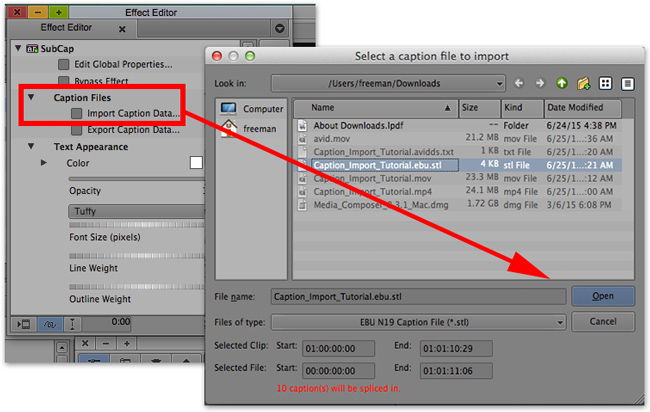
Next, go to Tools > Effect Editor. Navigate to Caption Files > Import Caption Data and select your caption file from your computer.
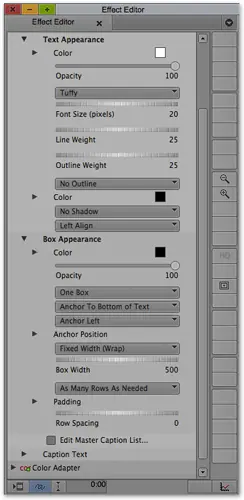
Step 4: Customize the Display of Your Captions in Avid Media Composer
In the Effect Editor, you can customize the appearance of your captions by adjusting the settings under SubCap.
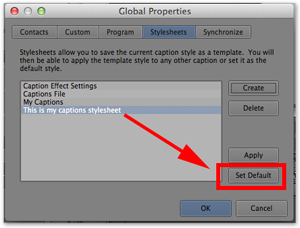
To save your customization settings, select Edit Global Properties, then select Stylesheets to create a stylesheet for future use. Click Set default, then OK to save your display customizations.
When you’re ready to publish your video, make sure to export it in a format that supports closed captions.
Editing Captions in Avid Media Composer
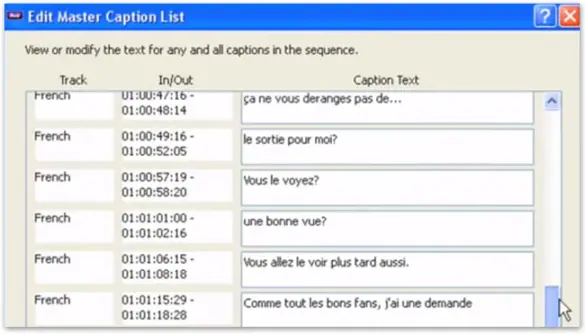
If you need to edit individual captions, select your caption track.
Go to Effects Editor > Box Appearance and check the box for Edit Master Caption List. Edit caption text, punctuation, and line breaks here.
For an in-depth video tutorial on adding captions with the SubCap Effects plugin, watch this YouTube tutorial.
How to Add Subtitles to Video in Avid Media Composer
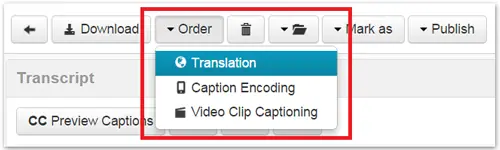
If you want to add subtitles in other languages, submit your video transcript for translation. In your 3Play Media account, click on your video file. Click on Order > Translation. Select your desired language and style of translation.
Once you receive your translated transcript, follow the same steps 2-4 above to upload a caption file in the new language.
resource
How to Add Closed Captions to Videos in Avid Media
This how-to guide will show you how to add captions and subtitle tracks to your videos in Avid Media Composer.
Filed under
Share this page
Related Resources
-
 Read more: ADA Title II Compliance Checklist
- Whitepaper
ADA Title II Compliance Checklist
-
 Read more: Event Planning Workbook
- Whitepaper
Event Planning Workbook
-
Read more: European Accessibility Act (EAA) Checklist
- Whitepaper
European Accessibility Act (EAA) Checklist