


- Audio Description
Audio Recording Guidelines
Audio Recording Guidelines
These recommendations are intended to produce the best possible audio recordings. A good audio recording dramatically improves the transcription quality. It lets transcriptionists focus on the finer details, such as researching difficult words and ensuring correct punctuation, rather than trying to discern what was said. This is particularly important in cases with multiple speakers, background noise, complicated vocabulary, or heavy accents.
Coach your speakers to “speak naturally into the microphone”. Do not instruct speakers to over articulate words.
- Use a high-quality microphone, either a headset microphone or a mounted directional microphone. As a rule of thumb, spending at least $50 on a microphone is a good investment.
- If a headset microphone is used, be sure that the transducer is at least 1″ away from the face and slightly below the lower lip.
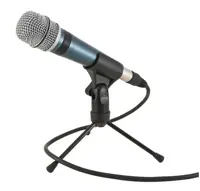
- A standing microphone should be placed 9” – 15″ directly in front of the speaker. This provides the best tradeoff between clarity and risk of over-saturation.
- If there are multiple speakers, providing a separate microphone to each speaker is best. A bi-directional microphone works well for two speakers sitting across from each other at the appropriate distance away from the microphone. The multiple microphone signals should be mixed into a single channel.
- The speaker should not hold or wear the microphone. It should either be a head-set mic or be mounted on a stable structure in front of them. This reduces the likelihood that the microphone will move around during recording.
- Use a microphone “pop” filter, either one that comes with the microphone or a separately purchased standing one.
- Calibrate the input level. If your recording device has a VU meter, have the speaker talk naturally – at the appropriate distance from the mic – and make sure the levels are in a good range. If a VU meter is not available, try a sample recording and listen back to make sure the level sounds good.
- Minimize background noise. If you can notice the noise just standing and listening, it will be much worse on the recording. Making a sample recording and listening to it is a good way to discover the noise level. Often, putting soft materials between the microphone and air vents and machinery will block most of the noise.
- Try to eliminate background talking or music. This is a frequent source of poor quality audio.
- Avoid recording in rooms that have a discernible ‘echo’. This is especially important if the microphone placement cannot be optimal (i.e. if the microphones are distant from the speaker or speakers). Listening to a recording sample is a good way to see if the echo is a problem. An echo-y room will produce “hollow sounding” speech, as if the speaker is at the other end of a tube.
- If the audio input to your recording device allows you to select the sampling rate, choose 16 KHz or higher. If it allows you to select the digital audio sample resolution, choose 16 bits or higher.
- If the audio input to your recording device supports “automatic gain control” (“AGC”) or “voice activity detection” (“VAD”), disable this feature.
- Coach your speakers to “speak naturally into the microphone”. Do not instruct speakers to over articulate words.
Filed under
Share this page
Related Resources
-
 Read more: ADA Title II Compliance Checklist
- Whitepaper
ADA Title II Compliance Checklist
-
 Read more: Event Planning Workbook
- Whitepaper
Event Planning Workbook
-
Read more: European Accessibility Act (EAA) Checklist
- Whitepaper
European Accessibility Act (EAA) Checklist