


- Audio Description
How To Create and Add Audio Description for Vimeo Videos
•

Create Audio Description for Your Vimeo Videos
Vimeo now supports multiple audio tracks on videos, meaning it is possible to add audio description (AD) to your Vimeo videos!
Audio description, also known as descriptive audio or video description, provides narration of relevant visual information in a video and is an accommodation for blind and low vision viewers. Audio description is required by law for some content in the U.S. and Canada. Learn more about audio description standards and compliance.
Want to ensure your Vimeo content reaches the millions of people with blindness or low vision? Read on to learn how to create and add audio descriptions for your Vimeo videos.
How To Create Audio Description for Your Vimeo Videos
The two most common ways to add audio description to Vimeo videos are to either use a professional audio description vendor or create descriptions manually.
Using a professional audio description vendor like 3Play can help guarantee high-quality, accurate descriptions. Our professional describers watch your video, then utilize technology and human editing to create clear, accurate descriptions that follow the DCMP guidelines. The descriptions, using synthesized speech or professional voice actors, are placed using the existing timecodes from your caption file so that they don’t disrupt the viewer from the original audio track.
Going the DIY route can be a more labor- and time-intensive process, but there are some workaround options for adding audio description to your Vimeo videos, which we will cover in this blog.
Get started with audio description ➡️
Outsourcing to 3Play Media
Step 1: Order Audio Description
Begin by logging into your 3Play Media account. Don’t have an account? Learn how to get started with 3Play.
To order audio description, you must first order transcription.
Select Order Services at the top of the screen, and select Transcription & Captioning as your main service. Choose your preferred turnaround time, and click next to continue.
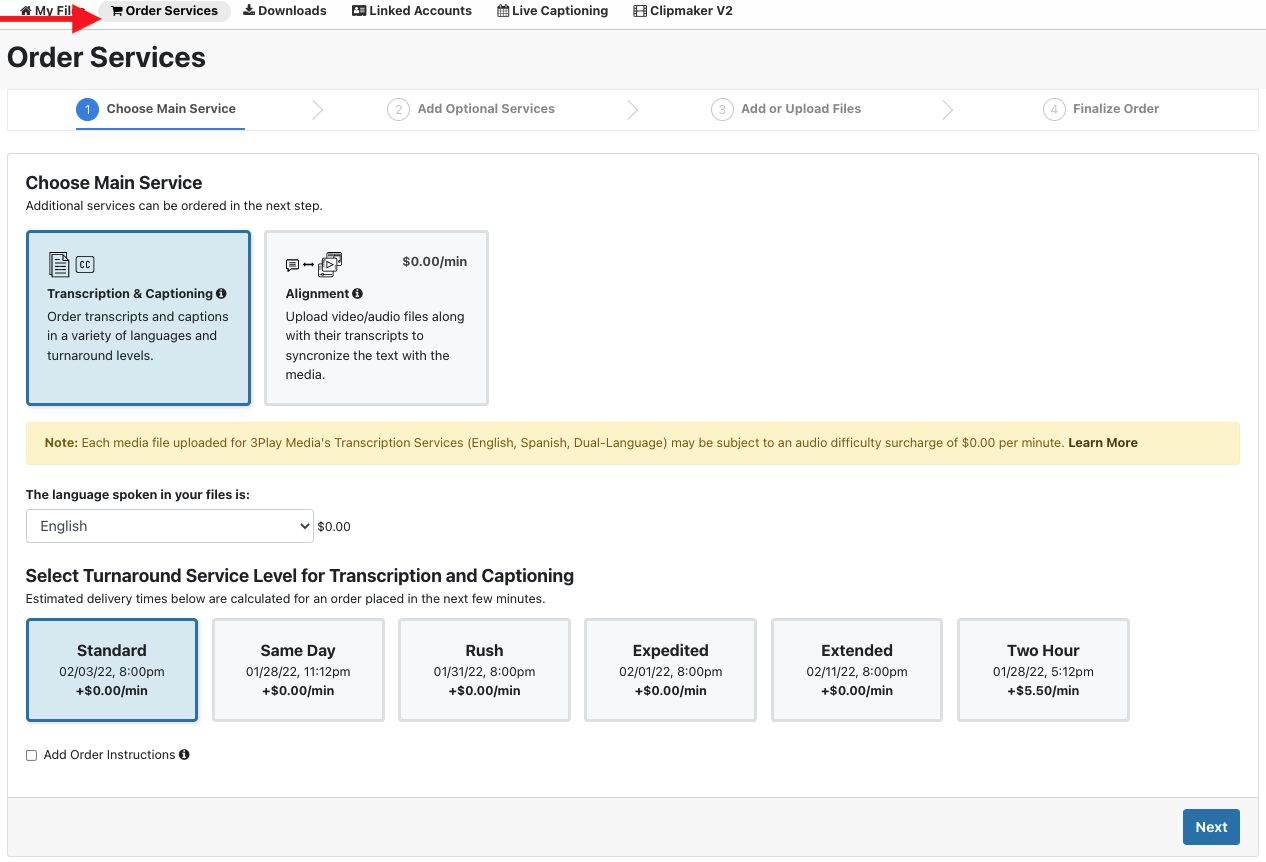
Select Audio Description as an additional service. Choose your preferred service level and turnaround time, then click next.

Select the method you are going to use to upload your video. You can upload directly from your computer or utilize another upload method.
From Links can be a great option for Vimeo videos, especially those you don’t own. Copy and paste the video URL, click Add Files, then hit next.
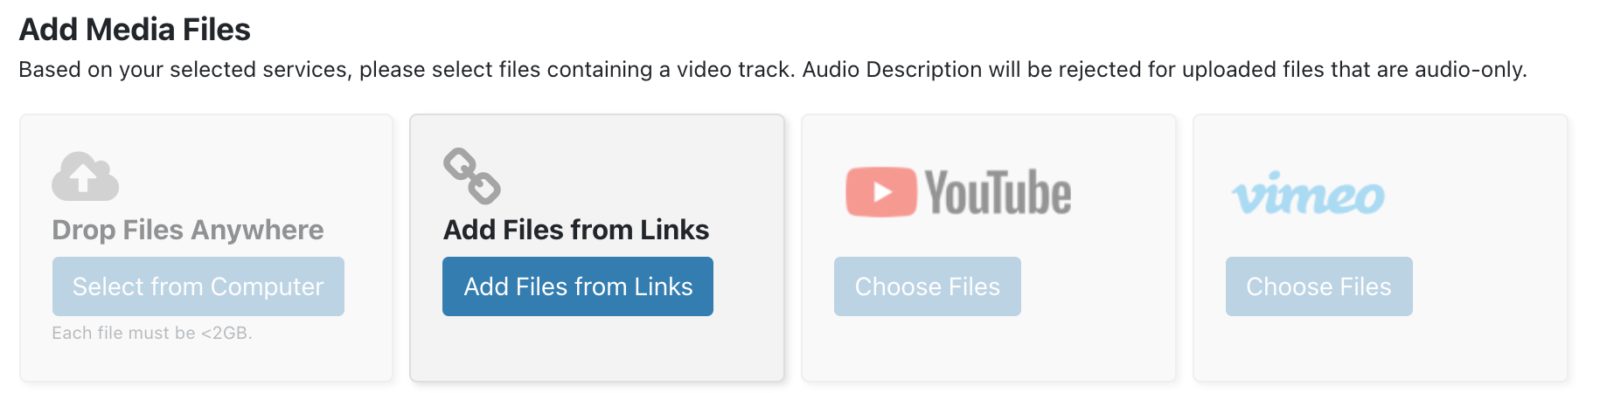
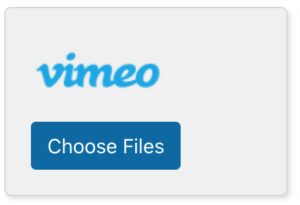
You can also select a file from a connected Vimeo account by choosing your video file under Vimeo.
End-to-end integration with Vimeo’s audio description capabilities is not yet supported. However, you can still use 3Play Media to create audio descriptions for your Vimeo videos using the steps outlined in this blog!
Once you have uploaded your video through your preferred method, it’s time to review and submit.
- If you already have a transcribed file from a Vimeo video in your account, navigate to the file for which you want audio description, click on the file name, choose Order More when the menu appears on the right of the screen, and choose Audio Description. Follow the prompts to place your order.
- If you already have an audio description file from a Vimeo video in your account, continue to Step 2.
Step 2: Add Your Audio Description File to Your Vimeo Video
Once your 3Play Media audio description file is finished and downloaded, you can either upload your Vimeo video with the audio description track embedded (recommended for videos with extended AD) or you can add the audio description to your Vimeo video as a separate track.
Note that Vimeo allows one additional audio track per uploaded video for Free subscription plans. Paid Vimeo subscribers can add up to 20 audio tracks per uploaded video.
- Sign in to your Vimeo account
- Select your video in your Vimeo library to open the video settings page
- Select Captions on the left side of the page
- Select Audio tracks
- Choose the language the original audio is in from the dropdown menu
- Click the plus sign button (+) to upload your audio description file or use the drag and drop option. Vimeo supports WAV, M4A, AAC, and MP3 audio file formats for audio tracks.
- Choose your file’s Language and choose “Audio description” for the Type
- The file will upload and become available for viewers to choose from the player
DIY Method
Choosing to create descriptions yourself can take ample time and effort. However, depending on your workflow, this may be a suitable option for your organization.
First, you’ll want to create an audio description transcript. The transcript is a text document that includes both the descriptions of the visual elements and the captions of the original audio.
The audio description transcript will allow blind and low vision viewers to use their screen readers. Not only will they understand the original spoken audio, but they’ll also be able to get a picture of what’s being visually depicted in the video.
While DIY audio descriptions are better than having none at all, it’s best to have the descriptions in the actual video because it improves the viewer experience. Blindness isn’t all or nothing. In fact, many blind people still have some vision, even if it may be a small percentage. A transcript does not allow viewers to watch the video and read it simultaneously.
However, you could use this transcript to record the descriptions for your video! When you have the timecodes of the captions, you’ll know precisely where the natural pauses between the dialogue are located. This will make recording the descriptions simpler, since you know exactly where they should go.
If you decide to go with an audio description transcript instead of recording the audio description and adding it in the video, we recommend putting it in the description box below the video or linking it to a separate URL.
Using the 3Play Plugin with Vimeo
If you are seeking robust audio description and video accessibility capabilities, 3Play Media’s Plugin is another great option for publishing audio description.
The 3Play Plugin remains available as we continue to build out the functionality of our new Access Player. If you’re looking for extended audio description support, the 3Play Plugin integrates with Vimeo and intelligently pauses the source video content until the description is complete before resuming play.
Using the 3Play Plugin
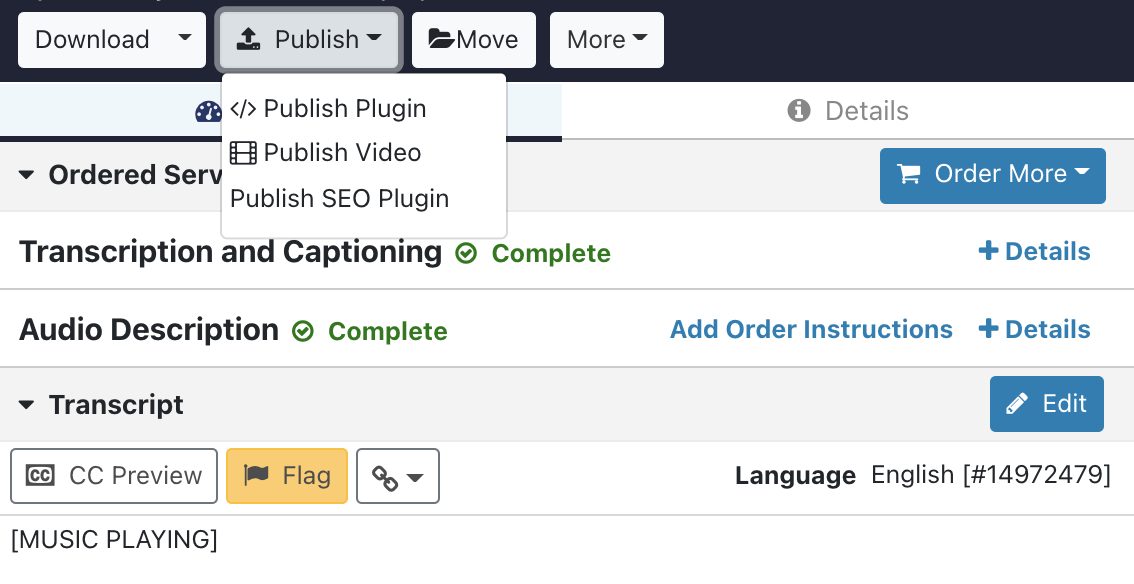
Once you have a completed Audio Description file from a Vimeo video, click on the file you want to publish. Select Publish from the top right window, then Publish Plugin. The plugin menu will open. Select Audio Description and any other features you want included in your plugin, and choose Vimeo as your video player. You will see a preview on the left side of the menu window.
Next, copy the single line embed code provided, and paste it into the bodyof your HTML.

Your video will now appear with the audio description plugin underneath. You can toggle the audio description on or off and change the volume of the description separately from the volume of your original audio track. Try it out:
Make your Vimeo videos accessible! Get started today with audio description:
Filed under
About the author
Share this page
Related Posts
-
 Read more: AI Dubbing vs. Traditional Dubbing: How Media Leaders Should Choose in 2026
- Dubbing
AI Dubbing vs. Traditional Dubbing: How Media Leaders Should Choose in 2026
-
 Read more: ADA Title II Deadline Extended: What This Means for Public Entities
- Legislation & Compliance
ADA Title II Deadline Extended: What This Means for Public Entities
-
 Read more: 8 Best AI Dubbing Tools in 2026
- Dubbing
8 Best AI Dubbing Tools in 2026